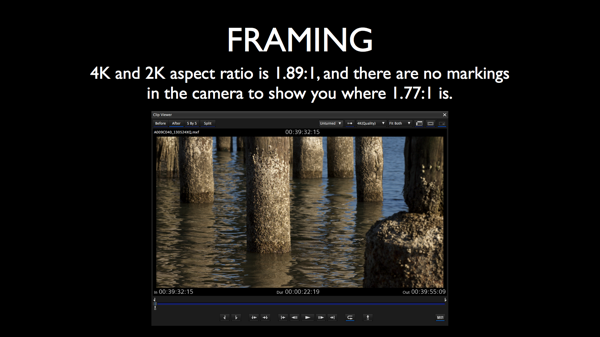
This is something I only really learned when working on a DI for a 4K demo project I shot recently for Canon. The DCP container format is designed to hold a 1.89:1 image, which seems to be a compromise between 2.4:1 (“scope”), 1.85:1 (U.S. widescreen), 1.77:1 (16:9 HD) and 1.66:1 (European widescreen). When shooting 4K or 2K with an FS700 you’ll be looking at a 1.89:1 frame but there are no edge markers to show you were 16:9 cuts off. This wasn’t an issue for the demo that Adam Wilt and I shot for this presentation but it could certainly be a problem when composing frames for a project with really strong compositions.
The Sony raw viewer does have the proper guides, by the way:
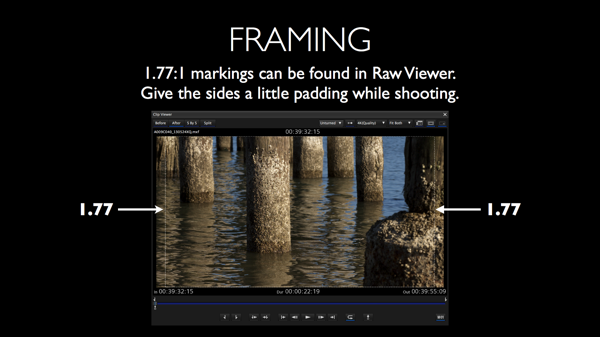
You just won’t see those while you’re shooting.
Image movement is a big deal in 4K. There’s a ton of detail in the image, and when all of it moves the result can be a bit jarring and might even induce motion sickness. The biggest issue is that moving the frame results in image blur, and image blur reduces resolution. It’s quite possible that lot of image blur will be disturbing to the audience when the gorgeous high-resolution image they’re watching dissolves into mush during a whip pan. Camera movement should be planned carefully.
4K is an “epic” format. If your project is going to be shown in 4K then take advantage of that: frame wide shots that allow the viewer to look around, much the way you might in 3D. There’s no reason to grab closeups of everything the viewer should notice because, in 4K, they’re going to notice everything. If you have that kind of palette to work with, why not use it?
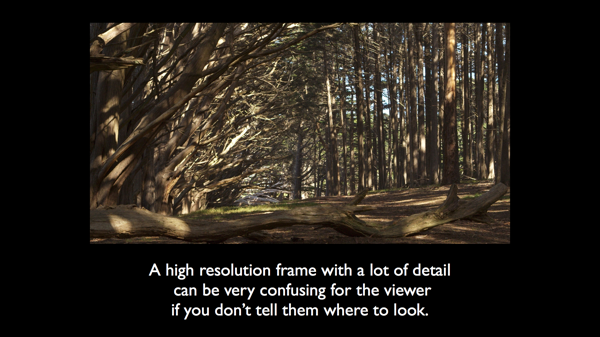
When I first saw 4K images on a monitor down at Sony Studios I was blown away by the detail. I was also completely confused by where I should be looking, and some images were so complex I had minor panic attacks trying to take in all the detail before the edit occurred. Part of the art of cinematography is guiding the viewer through the frame, and that’s never been more important than in 4K display.
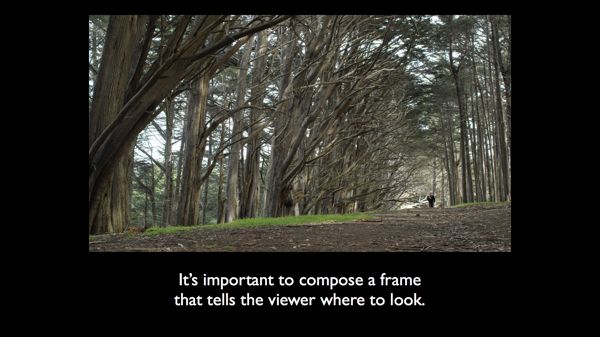
This is a roughly graded frame from a project I shot for Canon’s 4K demo reel. Hopefully it’s clear to you how your eye should move through the frame. If not…
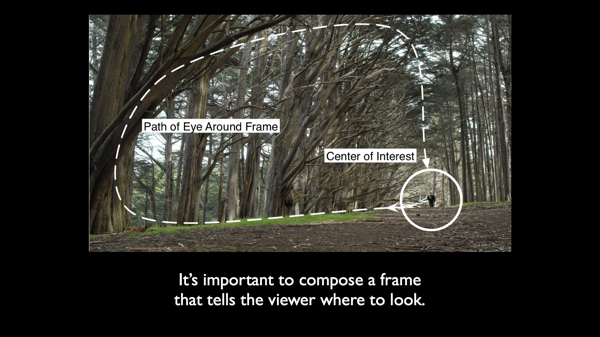
…this is what I intended. I used perspective and contrast to start you out looking at the distant figure, and then gave you a path to follow around the frame so you could take in the detail before returning to the figure. In this way I know that you’ll see everything you need to see before the edit, and you don’t have to worry about missing any amazing detail because I’ve given you a path to follow that will take you through the picture in plenty of time before the edit occurs.

When composing large detailed images it’s important to think like a painter. A massive portion of painting design is constructing a composition that keeps the viewer focused within the frame and gives them a path within the image that leads them to every important detail. Painters have to work extra hard at this: not only are they presenting a lot of visual information at one go, but they don’t have a captive audience in a theater staring at their work within a large black frame. Their work is usually hanging on a white wall only a few feet away from their competition, so they have to do a lot more to keep you focused on their work in the hope that you’ll appreciate it enough to buy it.
I’ve found this book to be immensely helpful in my continuing artistic education.
I consult for DSC Labs, and one of the perks of doing so is that I get access to some very cool test charts like the DSC Xyla. The Xyla is the fastest way to determine a camera’s dynamic range, as well as to see with your own eyes exactly what any gamma curve is doing. More on that in a bit.
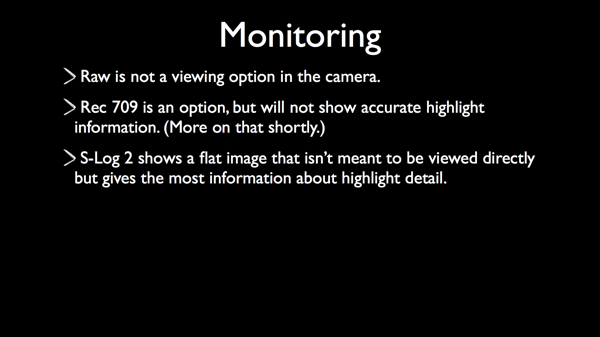
You can’t see “raw” in the camera. This is fine as Sony’s raw is captured the way the camera sees it, in linear light gamma, which means that all you’d see is a very dark image with perfectly exposed highlights.
The Rec 709 LUT will give you an idea of how the footage will look with a very rough grade, and is the only “technically correct” image that the camera will show you when shooting raw–but it comes at a very steep price.
S-Log2 is very, very flat as it’s meant to preserve the most dynamic range in the image and will allow you to see highlight detail very clearly, but it’s not very good at all for judging shadow detail.
Gamma curves are overlaid onto the raw image in the camera for ease of viewing. They are not baked into the footage.
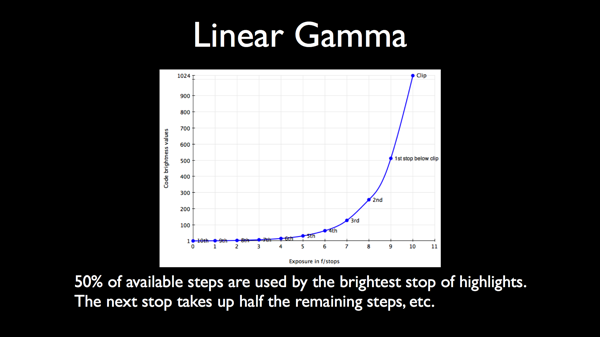
Linear gamma is how silicon sensors see the world. The first 50% of the signal generated by light hitting the sensor goes to the first full stop of dynamic range, usually the brightest highlights. Half of what’s left goes to the next stop down, and half of that goes to the next stop down, etc. This is a hugely inefficient way to store data, but it’s the only way to preserve everything the camera saw. The most important aspect of shooting raw is that de-Bayering algorithms improve over time, which means that it’s possible to go back and get better color and highlight detail out of old footage simply by using newer software.
The price we pay for this is that the amount of data we need to record is HUGE.
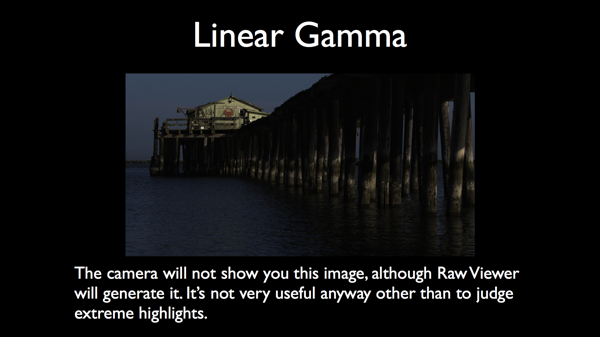
This is what linear gamma-encoded raw looks like. There’s a reason Sony doesn’t let you see this view in the camera: it’s not very useful.
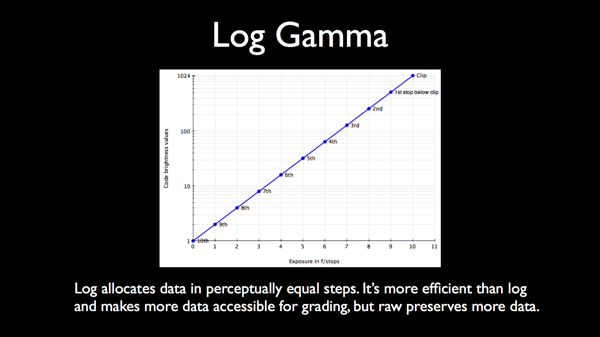
This graph shows the exact same data in the linear graph but encoded in log format, which allocates the same number of data steps to each stop of dynamic range. It’s a very efficient way to store data but it doesn’t allow you to go back later and manipulate the image with new de-Bayering algorithms the way raw does.
Log is basically “lossy compression” as it throws away a lot of highlight detail. The good news is that there’s so freaking much highlight data captured in linear gamma that you can afford to throw it away if you need to. (You just can’t go back later and pull more out of it.)
You can’t record 4K raw in log gamma but you can view it that way, which is handy as you can quickly get an idea of how much highlight and shadow detail is in the image.
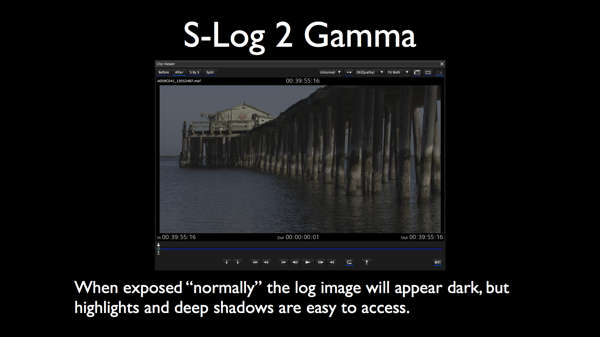
The log image may look a little dark because most of the important information is stored in the center of the curve, away from the edges of the curve where extreme highlights and shadows live. Log makes it very easy to push all these tones around later in a grade to increase contrast.
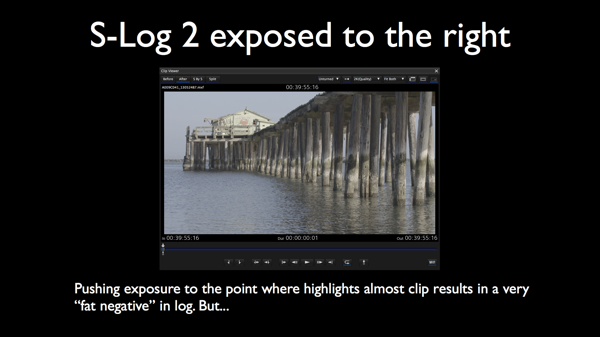
I hate exposing to the right. The result is that every image has it’s own exposure, which results in more work for a colorist as every shot is inconsistent with the rest based on how much highlight detail is in the image. With the FS700, though, it’s really the only way to go as the only exposure reference tools available in the camera are a histogram and zebras. This allows you to expose in such a way that you capture as much of the available image information as possible, but your editor is going to freak out…
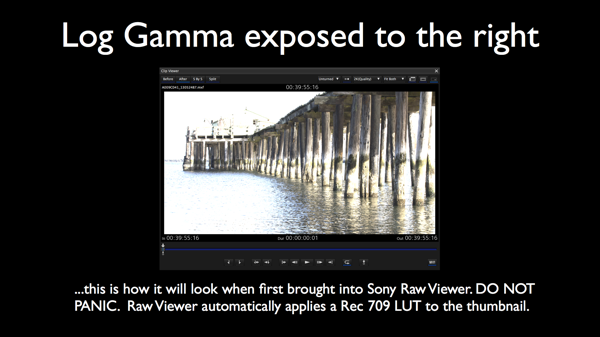
…because the clip thumbnail shows up like this in Sony raw viewer, which applies a Rec 709 LUT to make the thumbnail look “normal.” Tell your editor not to panic, because you’re doing the colorist a favor.
Next: More about Gamma, plus Curves and Charts…
